Oracle11gR2 RAC Step by Step Installation Procedures on Oracle VM VirtualBox 5.0
1. Create VM on Windows 7 Host Operating System
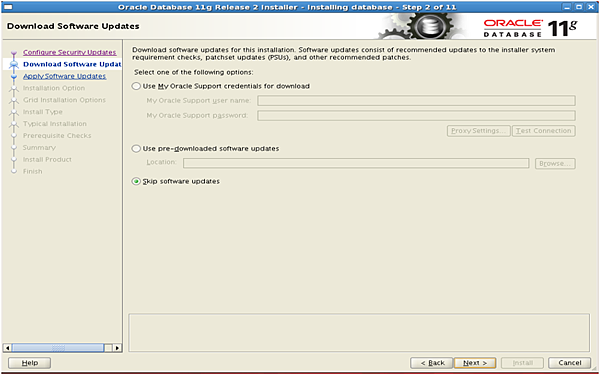
2. Install the Guest Operating System
3. Preparation for the RAC Environment
4. Create Shared Disks
5. Clone the Hard Disk
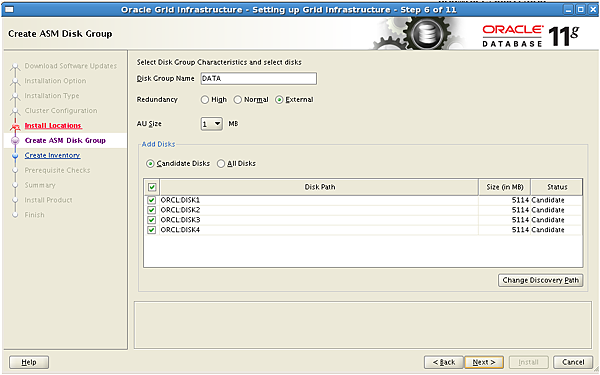
6. Install the Grid Infrastructure
7. Install the Oracle RAC Databases
1. Create VM on Windows 7 Host Operating System
-- Create a new 30G virtual hard disk image named RAC1.vdi
F:\VirtualBox> VBoxManage createhd --filename "F:\VirtualBox VMs\RAC1.vdi" --size 30720 --format VDI --variant Fixed
-- Create a new Virtual Machine named RAC1
F:\VirtualBox> VBoxManage createvm --name RAC1 --ostype "RedHat_64" --register
-- Add a SATA controller with the dynamic disk attached
F:\VirtualBox> VBoxManage storagectl RAC1 --name "SATA" --add sata --controller IntelAHCI
F:\VirtualBox> VBoxManage storageattach RAC1 --storagectl "SATA" --port 0 --device 0 --type hdd --medium "F:\VirtualBox VMs\RAC1.vdi"
-- Add an IDE controller with a RHEL 5.5 DVD drive attached, using the specified ISO file:
F:\VirtualBox> VBoxManage storagectl RAC1 --name "IDE" --add ide
F:\VirtualBox> VBoxManage storageattach RAC1 --storagectl "IDE" --port 0 --device 0 --type dvddrive --medium E:\ISO\RHEL5.5.iso
-- Add an IDE controller with a VBoxGuestAdditions DVD drive attached, using the specified ISO file:
F:\VirtualBox> VBoxManage storageattach RAC1 --storagectl "IDE" --port 1 --device 0 --type dvddrive --medium \
F:\VirtualBox> E:\ISO\VBoxGuestAdditions_5.0.16.iso
-- Misc system settings.
F:\VirtualBox> VBoxManage modifyvm RAC1 --ioapic on
F:\VirtualBox> VBoxManage modifyvm RAC1 --boot1 dvd --boot2 disk --boot3 none --boot4 none
F:\VirtualBox> VBoxManage modifyvm RAC1 --memory 4096 --vram 128
F:\VirtualBox> VBoxManage modifyvm RAC1 --nic1 bridged --bridgeadapter1 "Realtek PCIe GBE Family Controller" --nic2 intnet
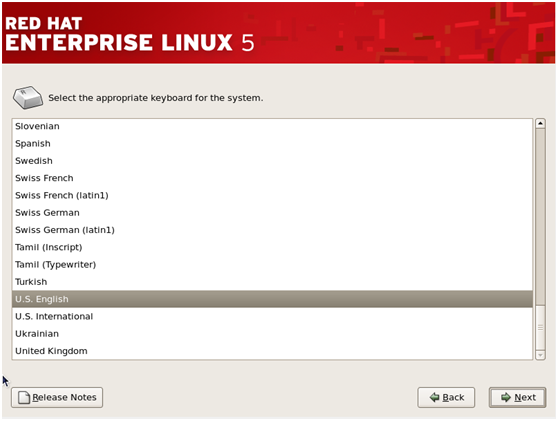
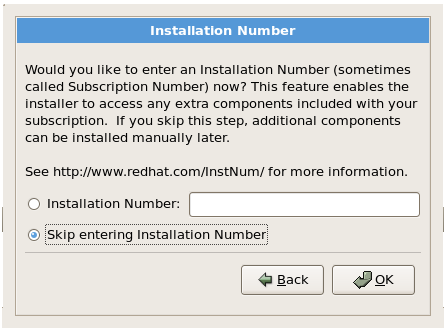
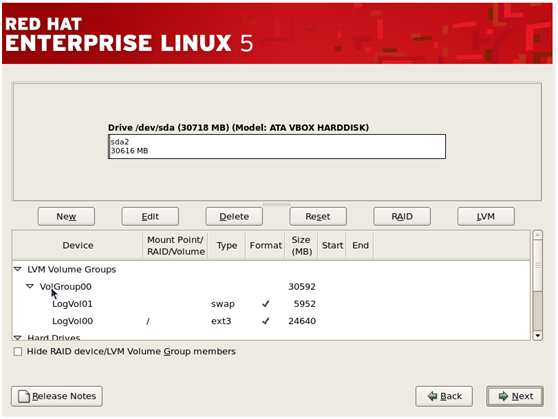
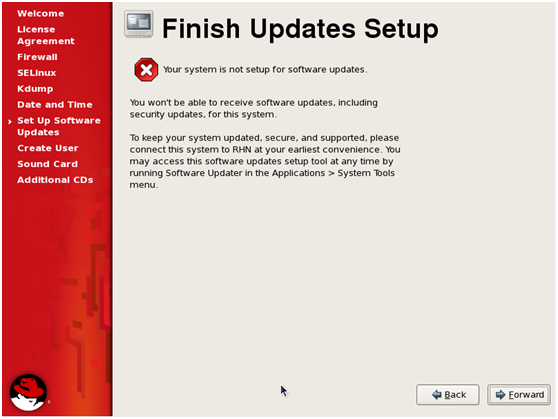
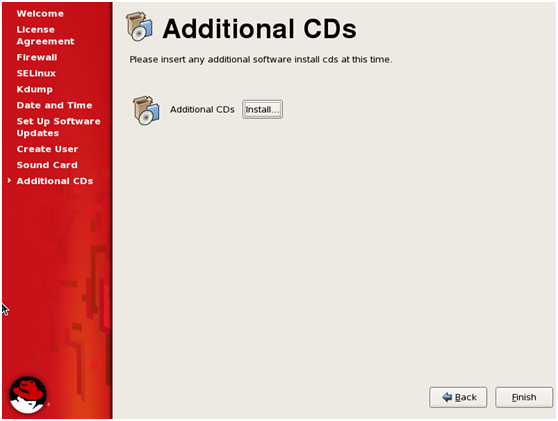
2. Install the Guest Operating System
Start to install the OS - RHEL 5.5:


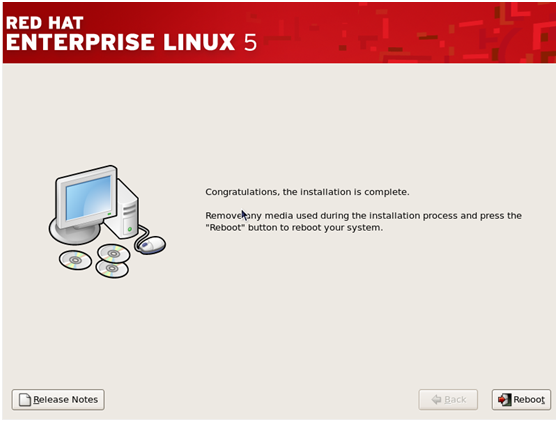
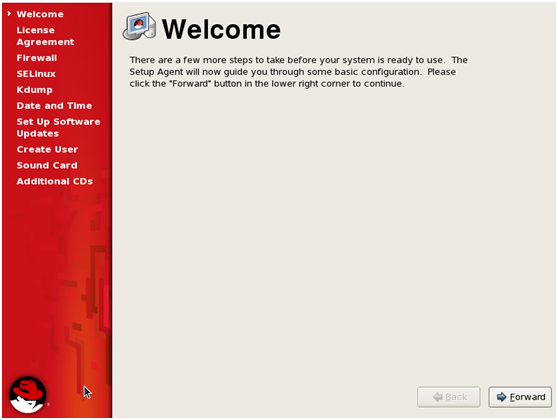
Here's the screen shot after the reboot of the VM:


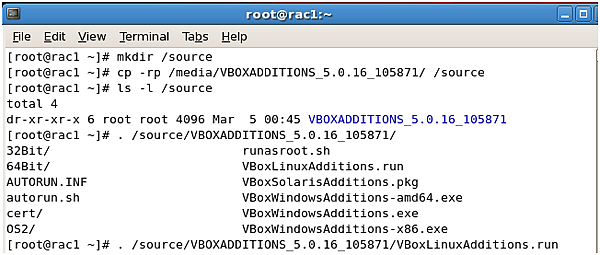
Install VM Virtual Box Guest Additions:

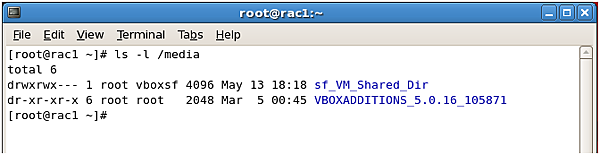
Add the shared directory named "VM_Shared_Dir" as follows:
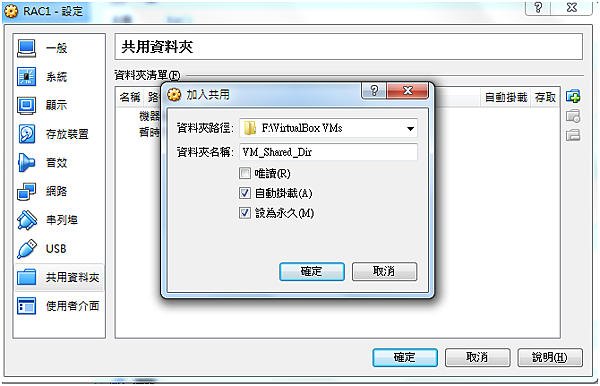
reboot the machine to take effect.
The shared directory has appeared as follows:
3. Preparation for the RAC Environment:
cat <<EOF > /etc/hosts
127.0.0.1 localhost.localdomain localhost
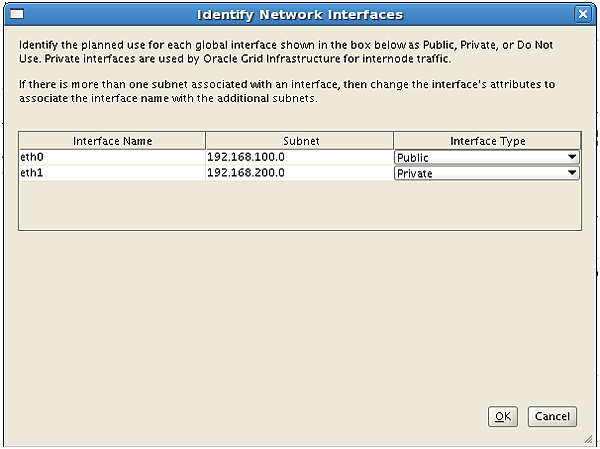
# Public (eth0)
192.168.100.101 rac1
192.168.100.102 rac2
# Private (eth1)
192.168.200.101 rac1-priv
192.168.200.102 rac2-priv
# Virtual
192.168.100.103 rac1-vip
192.168.100.104 rac2-vip
# SCAN
192.168.100.100 scan
EOF
mv /etc/security/limits.conf /etc/security/limits.conf.old
cat<<EOF > /etc/security/limits.conf
grid soft nproc 16384
grid hard nproc 16384
grid soft nofile 1024
grid hard nofile 65536
grid soft stack 1024
grid hard stack 32768
oracle soft nproc 2047
oracle hard nproc 16384
oracle soft nofile 1024
oracle hard nofile 65536
oracle soft stack 10240
oracle hard stack 32768
EOF
If DNS was not present, the resolver configuration file needs to be renamed as follows:
mv /etc/resolv.conf /etc/resolv.conf.bak
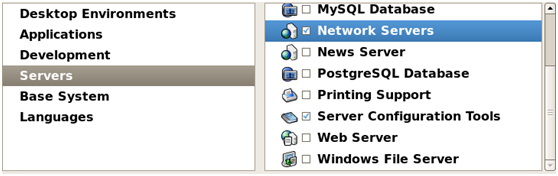
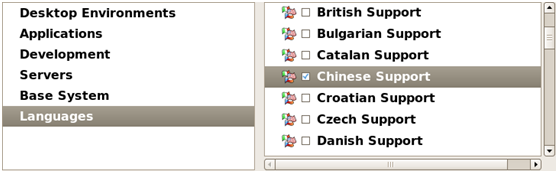
Check whether required packages were installed.
(if one or more packages were not installed, please install those missing packages right away from the OS Server Installation directory)
# rpm -q --qf '%{NAME}-%{VERSION}-%{RELEASE} (%{ARCH})\n' binutils \
compat-libstdc++-33 \
elfutils-libelf \
elfutils-libelf-devel \
gcc \
gcc-c++ \
glibc \
glibc-common \
glibc-devel \
glibc-headers \
ksh \
libaio \
libaio-devel \
libgcc \
libstdc++ \
libstdc++-devel \
make \
sysstat \
unixODBC \
unixODBC-devel \
For example:
package sysstat is not installed
package unixODBC is not installed
package unixODBC-devel is not installed
[root@rac1 Server]# rpm -ivh sysstat-7.0.2-3.el5.x86_64.rpm \
> unixODBC-2.2.11-7.1.x86_64.rpm \
> unixODBC-devel-2.2.11-7.1.x86_64.rpm
warning: sysstat-7.0.2-3.el5.x86_64.rpm: Header V3 DSA signature: NOKEY, key ID 37017186
Preparing... ########################################### [100%]
1:unixODBC ########################################### [ 33%]
2:sysstat ########################################### [ 67%]
3:unixODBC-devel ########################################### [100%]
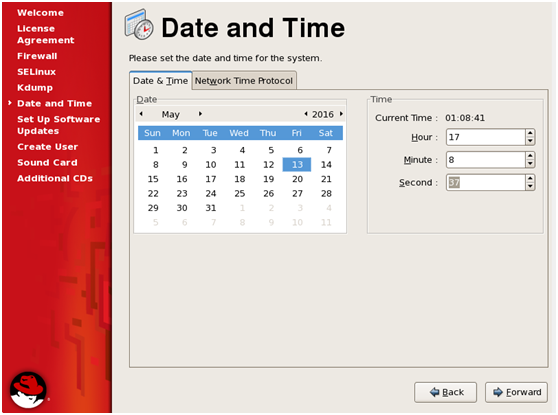
Deactivate Network Time Protocol (NTP) (if activated ) as follows:
[root@rac1 ~]# /sbin/service ntpd stop
[root@rac1 ~]# chkconfig ntpd off
[root@rac1 ~]# mv /etc/ntp.conf /etc/ntp.conf.bak
[root@rac1 ~]# rm /var/run/ntpd.pid
Deactivate Sendmail (if activated ) as follows:
[root@rac1 ~]# /sbin/service sendmail stop
[root@rac1 ~]# chkconfig sendmail off
Create OS groups and users as follows:
[root@rac1 Server]# groupadd -g 500 dba
[root@rac1 Server]# useradd -u 500 -g dba grid
[root@rac1 Server]# useradd -u 501 -g dba oracle
[root@rac1 Server]# id grid ; id oracle
uid=500(grid) gid=500(dba) groups=500(dba)
uid=501(oracle) gid=500(dba) groups=500(dba)
Set the password for the newly created OS users as follows:
[root@rac1 Server]# passwd grid
[root@rac1 Server]# passwd oracle
Create $ORACLE_BASE , $ORACLE_HOME and INVENTORY directories as follows:
[root@rac1 Server]# mkdir -p /grid/orabase
[root@rac1 Server]# mkdir -p /grid/grid11203
[root@rac1 Server]# mkdir -p /oracle/db11203
[root@rac1 Server]# chown -R grid:dba /grid
[root@rac1 Server]# chown -R oracle:dba /oracle
[root@rac1 Server]# chmod -R 775 /oracle /grid
[root@rac1 Server]# mkdir -p /grid/oraInventory
[root@rac1 Server]# chown -R grid:dba /grid/oraInventory
[root@rac1 Server]# chmod -R 770 /grid/oraInventory
Switch to user grid , modify /home/grid/.bash_profile as follows:
[root@rac1 Server]# su - grid
[grid@rac1 ~]$ cat<<EOF> ~/.bash_profile
# .bash_profile
# Source global definitions
if [ -f /etc/bashrc ]; then
. /etc/bashrc
fi
export ORACLE_BASE=/grid/orabase
export ORACLE_HOME=/grid/grid11203
export PATH=/grid/grid11203/bin:$PATH:$HOME/bin
export NLS_LANG=AMERICAN_AMERICA.UTF8
export ORACLE_SID=+ASM1
alias sql='sqlplus / as sysasm'
EOF
Switch to user oracle , modify /home/grid/.bash_profile as follows:
[grid@rac1 ~]$ exit
[root@rac1 ~]# su - oracle
[oracle@rac1 ~]$ cat<<EOF> ~/.bash_profile
# .bash_profile
# Source global definitions
if [ -f /etc/bashrc ]; then
. /etc/bashrc
fi
export ORACLE_BASE=/oracle
export ORACLE_HOME=/oracle/db11203
PATH=/oracle/db11203/bin:$PATH:$HOME/bin
export PATH
export NLS_LANG=AMERICAN_AMERICA.UTF8
export ORACLE_SID=RACDB1
export ORACLE_UNQNAME=RACDB
alias sql='sqlplus / as sysdba'
EOF
shutdown the guest Operating System.
[root@rac1 ~]# shutdown -h now
On the host operating system(Windows 7 as my environment), switch to the command line interface:
cd F:\VirtualBox
F:
F:\VirtualBox> VBoxManage createhd --filename "F:\VirtualBox VMs\asm1.vdi" --size 5120 --format VDI --variant Fixed
F:\VirtualBox> VBoxManage createhd --filename "F:\VirtualBox VMs\asm2.vdi" --size 5120 --format VDI --variant Fixed
F:\VirtualBox> VBoxManage createhd --filename "F:\VirtualBox VMs\asm3.vdi" --size 5120 --format VDI --variant Fixed
F:\VirtualBox> VBoxManage createhd --filename "F:\VirtualBox VMs\asm4.vdi" --size 5120 --format VDI --variant Fixed
Connect the four newly created hard disks to the VM - RAC1.
F:\VirtualBox> VBoxManage storageattach RAC1 --storagectl "SATA" --port 1 --device 0 --type hdd --medium "F:\VirtualBox VMs\asm1.vdi" --mtype shareable
F:\VirtualBox> VBoxManage storageattach RAC1 --storagectl "SATA" --port 2 --device 0 --type hdd --medium "F:\VirtualBox VMs\asm2.vdi" --mtype shareable
F:\VirtualBox> VBoxManage storageattach RAC1 --storagectl "SATA" --port 3 --device 0 --type hdd --medium "F:\VirtualBox VMs\asm3.vdi" --mtype shareable
F:\VirtualBox> VBoxManage storageattach RAC1 --storagectl "SATA" --port 4 --device 0 --type hdd --medium "F:\VirtualBox VMs\asm4.vdi" --mtype shareable
Make the four hark disks shareable.
F:\VirtualBox> VBoxManage modifyhd "F:\VirtualBox VMs\asm1.vdi" --type shareable
F:\VirtualBox> VBoxManage modifyhd "F:\VirtualBox VMs\asm2.vdi" --type shareable
F:\VirtualBox> VBoxManage modifyhd "F:\VirtualBox VMs\asm3.vdi" --type shareable
F:\VirtualBox> VBoxManage modifyhd "F:\VirtualBox VMs\asm4.vdi" --type shareable
Start the "RAC1" VM by clicking the "Start" button on the toolbar:
[root@rac1 ~]# ls -l /dev/sd*
brw-r----- 1 root disk 8, 0 May 16 14:14 /dev/sda
brw-r----- 1 root disk 8, 1 May 16 2016 /dev/sda1
brw-r----- 1 root disk 8, 2 May 16 14:14 /dev/sda2
brw-r----- 1 root disk 8, 16 May 16 14:14 /dev/sdb
brw-r----- 1 root disk 8, 32 May 16 14:14 /dev/sdc
brw-r----- 1 root disk 8, 48 May 16 14:14 /dev/sdd
brw-r----- 1 root disk 8, 64 May 16 14:14 /dev/sde
Use the "fdisk" command to partition the disks sdb to sde. (PS. repeat fdisk command from sdb to sde)
[root@rac1 ~]# fdisk /dev/sdb
Device contains neither a valid DOS partition table, nor Sun, SGI or OSF disklabel
Building a new DOS disklabel. Changes will remain in memory only,
until you decide to write them. After that, of course, the previous
content won't be recoverable.
Warning: invalid flag 0x0000 of partition table 4 will be corrected by w(rite)
Command (m for help): n
Command action
e extended
p primary partition (1-4)
p
Partition number (1-4): 1
First cylinder (1-652, default 1):
Using default value 1
Last cylinder or +size or +sizeM or +sizeK (1-652, default 652):
Using default value 652
Command (m for help): w
The partition table has been altered!
Calling ioctl() to re-read partition table.
Syncing disks.
Verify the results:
[root@rac1 ~]# ll /dev/sd*1
brw-r----- 1 root disk 8, 1 May 16 2016 /dev/sda1
brw-r----- 1 root disk 8, 17 May 16 14:34 /dev/sdb1
brw-r----- 1 root disk 8, 33 May 16 14:37 /dev/sdc1
brw-r----- 1 root disk 8, 49 May 16 14:37 /dev/sdd1
brw-r----- 1 root disk 8, 65 May 16 14:37 /dev/sde1
Install Oracle ASMLib, which is an optional support library for the Automatic Storage Management (ASM) feature of the Oracle Database,
as follows:
[root@rac1 ~]# cd /media/sf_VM_Shared_Dir/ASMLib2.0
[root@rac1 ASMLib2.0]# rpm -Uvh oracleasm*
warning: oracleasm-2.6.18-194.el5-2.0.5-1.el5.x86_64.rpm: Header V3 DSA signature: NOKEY, key ID 1e5e0159
Preparing... ########################################### [100%]
1:oracleasm-support ########################################### [ 33%]
2:oracleasm-2.6.18-194.el########################################### [ 67%]
3:oracleasmlib ########################################### [100%]
[root@rac1 ASMLib2.0]# rpm -qa |grep oracleasm
oracleasm-support-2.1.8-1.el5
oracleasm-2.6.18-194.el5-2.0.5-1.el5
oracleasmlib-2.0.4-1.el5
At the point in the, we can shutdown the RAC1 VM again , in order to clone the second RAC VM, namely RAC2.
[root@rac1 ~]# shutdown -h now
Go back to the host operating system command line interface
F:\VirtualBox> VBoxManage clonehd "F:\VirtualBox VMs\RAC1.vdi" "F:\VirtualBox VMs\RAC2.vdi"
Create the "RAC2" virtual machine in VirtualBox in the same way as "RAC1" VM, except using an existing "F:\VirtualBox VMs\RAC2.vdi" virtual hard drive.
F:\VirtualBox> VBoxManage createvm --name RAC2 --ostype "RedHat_64" --register
F:\VirtualBox> VBoxManage storagectl RAC2 --name "SATA" --add sata --controller IntelAHCI
F:\VirtualBox> VBoxManage storageattach RAC2 --storagectl "SATA" --port 0 --device 0 --type hdd --medium "F:\VirtualBox VMs\RAC2.vdi"
Be sure to add the second network adaptor as "RAC1" VM did.
F:\VirtualBox> VBoxManage modifyvm RAC2 --nic1 bridged --bridgeadapter1 "Realtek PCIe GBE Family Controller" --nic2 intnet
F:\VirtualBox> VBoxManage modifyvm RAC2 --ioapic on
F:\VirtualBox> VBoxManage modifyvm RAC2 --boot1 disk --boot2 none --boot3 none --boot4 none
F:\VirtualBox> VBoxManage modifyvm RAC2 --memory 4096 --vram 128
Once the "RAC2" VM is ready, attach the shared disks to it as bellow:
F:\VirtualBox> VBoxManage storageattach RAC2 --storagectl "SATA" --port 1 --device 0 --type hdd --medium "F:\VirtualBox VMs\asm1.vdi" --mtype shareable
F:\VirtualBox> VBoxManage storageattach RAC2 --storagectl "SATA" --port 2 --device 0 --type hdd --medium "F:\VirtualBox VMs\asm2.vdi" --mtype shareable
F:\VirtualBox> VBoxManage storageattach RAC2 --storagectl "SATA" --port 3 --device 0 --type hdd --medium "F:\VirtualBox VMs\asm3.vdi" --mtype shareable
F:\VirtualBox> VBoxManage storageattach RAC2 --storagectl "SATA" --port 4 --device 0 --type hdd --medium "F:\VirtualBox VMs\asm4.vdi" --mtype shareable
Start the "RAC2" VM by clicking the "Start" button on the toolbar.
Log in to the "RAC2" virtual machine as the "root" user in order to reconfigure the network settings to match the following:
(using system-config-network command)
hostname: RAC2
IP Address eth0: 192.168.100.102 (public address)
Default Gateway eth0: 192.168.100.1 (public address)
IP Address eth1: 192.168.200.102 (private address)
Default Gateway eth1: none
Since the RAC2 VM was cloned from RAC1, we have to change the host name from rac1 to rac2, by the following commands:
[root@rac1 ~]# sed -i 's/rac1/rac2/g' /etc/sysconfig/network
[root@rac1 ~]# hostname rac2
[root@rac1 ~]# hostname
rac2
[root@rac1 ~]# init 6
Now we can bring back RAC1 VM by clicking the start button of RAC1 VM.
Ping each network ip (eth0 & eth1) from both machines as follows:
(On rac1 machine)
[root@rac1 ~]# ping -c 1 rac1 ; ping -c 1 rac1-priv ; ping -c 1 rac2 ; ping -c 1 rac2-priv
PING rac1 (192.168.100.101) 56(84) bytes of data.
64 bytes from rac1 (192.168.100.101): icmp_seq=1 ttl=64 time=0.016 ms
--- rac1 ping statistics ---
1 packets transmitted, 1 received, 0% packet loss, time 0ms
rtt min/avg/max/mdev = 0.016/0.016/0.016/0.000 ms
PING rac1-priv (192.168.200.101) 56(84) bytes of data.
64 bytes from rac1-priv (192.168.200.101): icmp_seq=1 ttl=64 time=0.009 ms
--- rac1-priv ping statistics ---
1 packets transmitted, 1 received, 0% packet loss, time 0ms
rtt min/avg/max/mdev = 0.009/0.009/0.009/0.000 ms
PING rac2 (192.168.100.102) 56(84) bytes of data.
64 bytes from rac2 (192.168.100.102): icmp_seq=1 ttl=64 time=0.289 ms
--- rac2 ping statistics ---
1 packets transmitted, 1 received, 0% packet loss, time 0ms
rtt min/avg/max/mdev = 0.289/0.289/0.289/0.000 ms
PING rac2-priv (192.168.200.102) 56(84) bytes of data.
64 bytes from rac2-priv (192.168.200.102): icmp_seq=1 ttl=64 time=0.244 ms
--- rac2-priv ping statistics ---
1 packets transmitted, 1 received, 0% packet loss, time 0ms
rtt min/avg/max/mdev = 0.244/0.244/0.244/0.000 ms
(On rac2 machine)
[root@rac2 ~]# ping -c 1 rac1 ; ping -c 1 rac1-priv ; ping -c 1 rac2 ; ping -c 1 rac2-priv
PING rac1 (192.168.100.101) 56(84) bytes of data.
64 bytes from rac1 (192.168.100.101): icmp_seq=1 ttl=64 time=1.74 ms
--- rac1 ping statistics ---
1 packets transmitted, 1 received, 0% packet loss, time 0ms
rtt min/avg/max/mdev = 1.745/1.745/1.745/0.000 ms
PING rac1-priv (192.168.200.101) 56(84) bytes of data.
64 bytes from rac1-priv (192.168.200.101): icmp_seq=1 ttl=64 time=1.74 ms
--- rac1-priv ping statistics ---
1 packets transmitted, 1 received, 0% packet loss, time 0ms
rtt min/avg/max/mdev = 1.745/1.745/1.745/0.000 ms
PING rac2 (192.168.100.102) 56(84) bytes of data.
64 bytes from rac2 (192.168.100.102): icmp_seq=1 ttl=64 time=0.017 ms
--- rac2 ping statistics ---
1 packets transmitted, 1 received, 0% packet loss, time 0ms
rtt min/avg/max/mdev = 0.017/0.017/0.017/0.000 ms
PING rac2-priv (192.168.200.102) 56(84) bytes of data.
64 bytes from rac2-priv (192.168.200.102): icmp_seq=1 ttl=64 time=0.014 ms
--- rac2-priv ping statistics ---
1 packets transmitted, 1 received, 0% packet loss, time 0ms
rtt min/avg/max/mdev = 0.014/0.014/0.014/0.000 ms
Configure Oracle ASM & Create ASM Disks
(On rac1 machine)
[root@rac1 ~]# oracleasm configure -i
Configuring the Oracle ASM library driver.
This will configure the on-boot properties of the Oracle ASM library
driver. The following questions will determine whether the driver is
loaded on boot and what permissions it will have. The current values
will be shown in brackets ('[]'). Hitting <ENTER> without typing an
answer will keep that current value. Ctrl-C will abort.
Default user to own the driver interface []: grid
Default group to own the driver interface []: dba
Start Oracle ASM library driver on boot (y/n) [n]: Scan for Oracle ASM disks on boot (y/n) [y]: y
Writing Oracle ASM library driver configuration: done
[root@rac1 ~]# oracleasm init
Creating /dev/oracleasm mount point: /dev/oracleasm
Loading module "oracleasm": oracleasm
Mounting ASMlib driver filesystem: /dev/oracleasm
[root@rac1 ~]# oracleasm createdisk DISK1 /dev/sdb1
Writing disk header: done
Instantiating disk: done
[root@rac1 ~]# oracleasm createdisk DISK2 /dev/sdc1
Writing disk header: done
Instantiating disk: done
[root@rac1 ~]# oracleasm createdisk DISK3 /dev/sdd1
Writing disk header: done
Instantiating disk: done
[root@rac1 ~]# oracleasm createdisk DISK4 /dev/sde1
Writing disk header: done
Instantiating disk: done
[root@rac1 ~]# oracleasm scandisks
Reloading disk partitions: done
Cleaning any stale ASM disks...
Scanning system for ASM disks...
[root@rac1 ~]# oracleasm listdisks
DISK1
DISK2
DISK3
DISK4
(On rac2 machine)
[root@rac2 ~]# oracleasm configure -i
Configuring the Oracle ASM library driver.
This will configure the on-boot properties of the Oracle ASM library
driver. The following questions will determine whether the driver is
loaded on boot and what permissions it will have. The current values
will be shown in brackets ('[]'). Hitting <ENTER> without typing an
answer will keep that current value. Ctrl-C will abort.
Default user to own the driver interface []: grid
Default group to own the driver interface []: dba
Start Oracle ASM library driver on boot (y/n) [n]: y
Scan for Oracle ASM disks on boot (y/n) [y]: y
Writing Oracle ASM library driver configuration: done
[root@rac2 ~]# oracleasm init
Creating /dev/oracleasm mount point: /dev/oracleasm
Loading module "oracleasm": oracleasm
Mounting ASMlib driver filesystem: /dev/oracleasm
[root@rac2 ~]# oracleasm scandisks
Reloading disk partitions: done
Cleaning any stale ASM disks...
Scanning system for ASM disks...
[root@rac2 ~]# oracleasm listdisks
DISK1
DISK2
DISK3
DISK4
6. Install the Grid Infrastructure
(On rac1 machine)
[root@rac1 ~]# ls -l /media/sf_VM_Shared_Dir/11203_Linux_x64/
total 3398288
-rwxrwx--- 1 root vboxsf 1358454646 Sep 22 2011 p10404530_112030_Linux-x86-64_1of7 -- Database.zip
-rwxrwx--- 1 root vboxsf 1142195302 Sep 22 2011 p10404530_112030_Linux-x86-64_2of7 -- Database.zip
-rwxrwx--- 1 root vboxsf 979195792 Sep 22 2011 p10404530_112030_Linux-x86-64_3of7 -- Grid Infrastructure.zip
[root@rac1 source]# unzip /media/sf_VM_Shared_Dir/11203_Linux_x64/p10404530_112030_Linux-x86-64_3of7\ --\ Grid\ Infrastructure.zip -d /source
[root@rac1 ~]# chown -R grid:dba /source/grid/
[root@rac1 ~]# chmod -R 770 /source/grid
Install Cluster Verification Utility (CVU) package on both rac1 and rac2 from the Oracle grid media as follows: (e.g. /source/grid/rpm/)
[root@rac1 ~]# cd /source/grid/rpm
[root@rac1 rpm]# ls -l
total 12
-rwxrwx--- 1 grid dba 8551 Sep 22 2011 cvuqdisk-1.0.9-1.rpm
[root@rac1 rpm]# export CVUQDISK_GRP=dba
[root@rac1 rpm]# rpm -Uvh cvuqdisk-1.0.9-1.rpm
Preparing... ########################################### [100%]
1:cvuqdk ########################################### [100%]
[root@rac1 rpm]# xhost +
access control disabled, clients can connect from any host
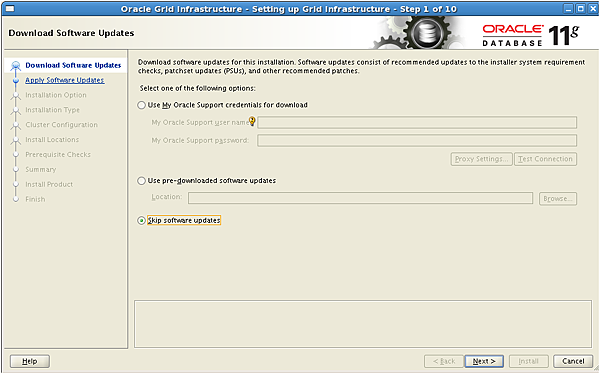
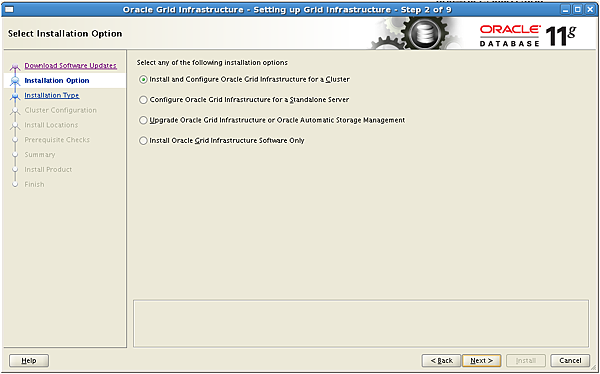
Switch to grid user and install the Grid Infrastructure by executing runInstaller as follows:
[root@rac1 rpm]# su - grid
[grid@rac1 ~]$ cd /source/grid
[grid@rac1 grid]$ ./runInstaller

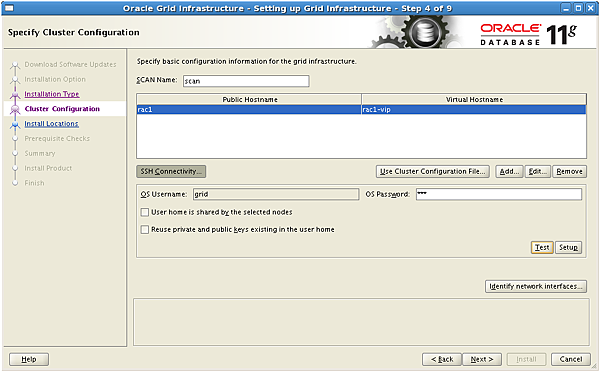

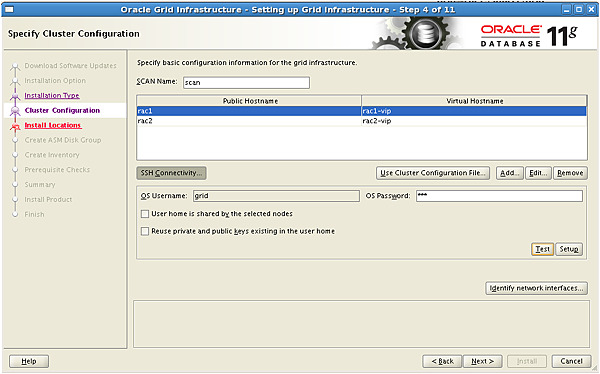
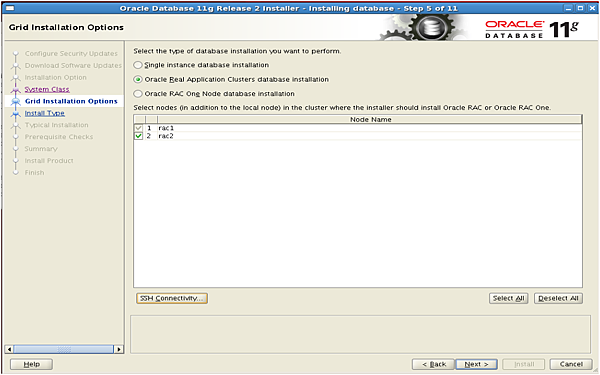
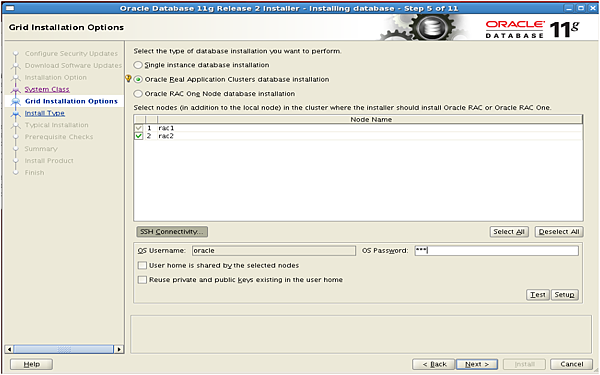
Add Second Public Hostname "rac2" and Virtual Hostname "rac2-vip".
Be sure to setup SSH Connectivity as well.
Click Yes to continue.

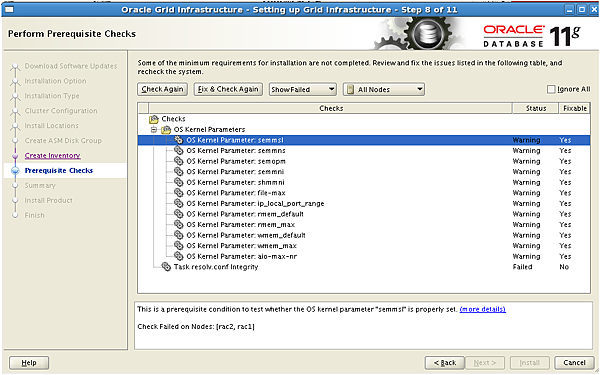
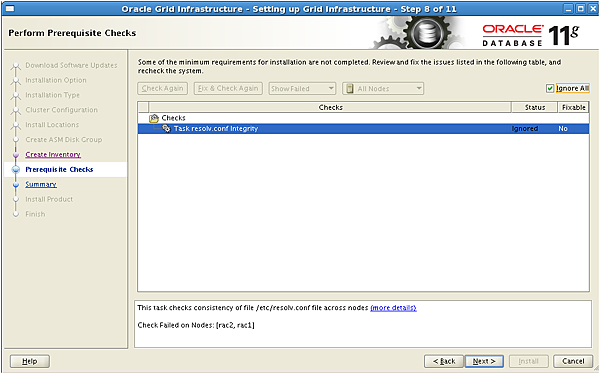
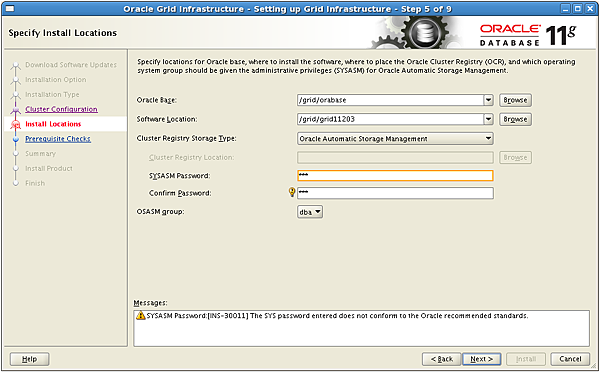
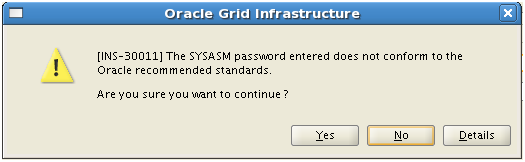
Since we are not using the DNS, we can just ignore the error above.


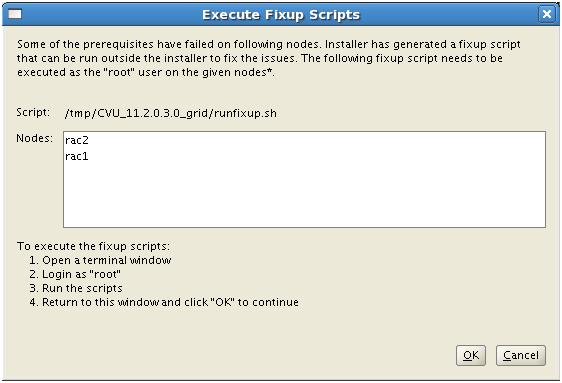
On rac1 VM, log in as "root" and run both shell scripts first.
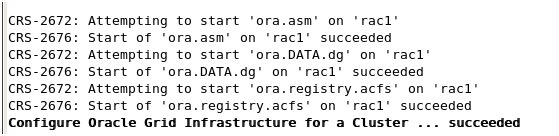
When rac1 has finished the scripts successfully, go to rac2 VM and log in as "root" to run the both shell scripts as well.
![]()
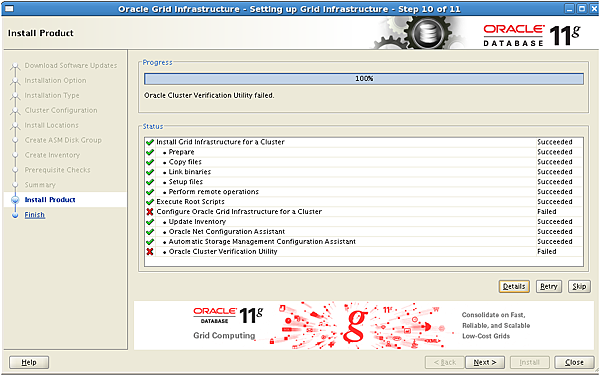
Since we are using the /etc/hosts file rather than the DNS to resolve SCAN name resolution, we can simply ignore the errors above.
We can check the cluster overall resource status as follows:
[root@rac1 ~]# su - grid
[grid@rac1 ~]$ crsctl status res -t
--------------------------------------------------------------------------------
NAME TARGET STATE SERVER STATE_DETAILS
--------------------------------------------------------------------------------
Local Resources
--------------------------------------------------------------------------------
ora.DATA.dg
ONLINE ONLINE rac1
ONLINE ONLINE rac2
ora.LISTENER.lsnr
ONLINE ONLINE rac1
ONLINE ONLINE rac2
ora.asm
ONLINE ONLINE rac1 Started
ONLINE ONLINE rac2 Started
ora.gsd
OFFLINE OFFLINE rac1
OFFLINE OFFLINE rac2
ora.net1.network
ONLINE ONLINE rac1
ONLINE ONLINE rac2
ora.ons
ONLINE ONLINE rac1
ONLINE ONLINE rac2
ora.registry.acfs
ONLINE ONLINE rac1
ONLINE ONLINE rac2
--------------------------------------------------------------------------------
Cluster Resources
--------------------------------------------------------------------------------
ora.LISTENER_SCAN1.lsnr
1 ONLINE ONLINE rac1
ora.cvu
1 ONLINE ONLINE rac1
ora.oc4j
1 ONLINE ONLINE rac1
ora.rac1.vip
1 ONLINE ONLINE rac1
ora.rac2.vip
1 ONLINE ONLINE rac2
ora.scan1.vip
1 ONLINE ONLINE rac1
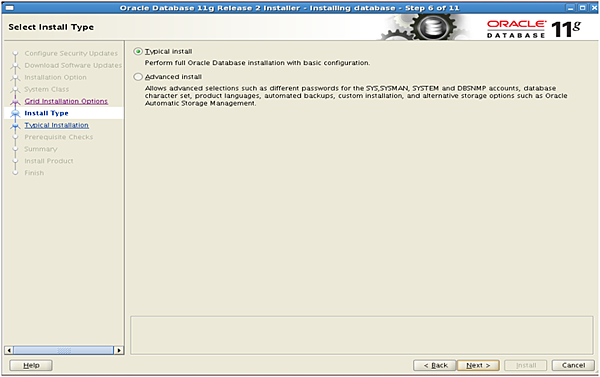
7. Install the Oracle RAC Databases
(On rac1 machine)
[root@rac1 ~]# ls -l /media/sf_VM_Shared_Dir/11203_Linux_x64/
total 3398288
-rwxrwx--- 1 root vboxsf 1358454646 Sep 22 2011 p10404530_112030_Linux-x86-64_1of7 -- Database.zip
-rwxrwx--- 1 root vboxsf 1142195302 Sep 22 2011 p10404530_112030_Linux-x86-64_2of7 -- Database.zip
-rwxrwx--- 1 root vboxsf 979195792 Sep 22 2011 p10404530_112030_Linux-x86-64_3of7 -- Grid Infrastructure.zip
[root@rac1 ~]# unzip /media/sf_VM_Shared_Dir/11203_Linux_x64/p10404530_112030_Linux-x86-64_1of7\ --\ Database.zip -d /source
[root@rac1 ~]# unzip /media/sf_VM_Shared_Dir/11203_Linux_x64/p10404530_112030_Linux-x86-64_2of7\ --\ Database.zip -d /source
[root@rac1 source]# xhost +
access control disabled, clients can connect from any host
[root@rac1 source]# su - oracle
[oracle@rac1 ~]$ cd /source/database/
[oracle@rac1 database]$ ./runInstaller

Click Yes to continue.
Click Yes to continue.

Click SSH Connectivity to setup SSH connectivity.
Click Setup
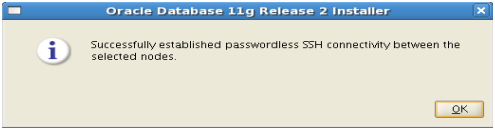
Click OK , then click Next.
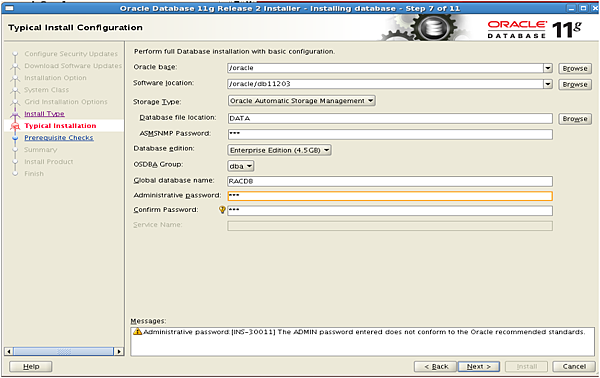
Let's fill up the required information above, then click Next.
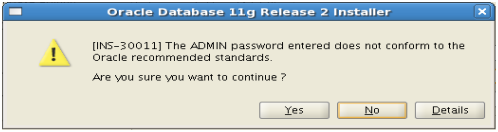
Click Yes to continue.

Check Ignore All icon and click Next.
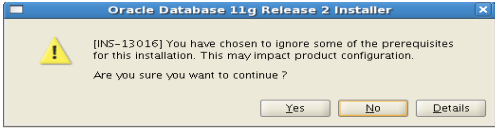
Click Yes to continue.
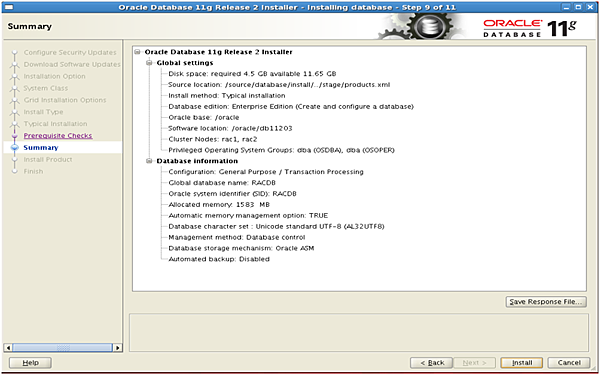
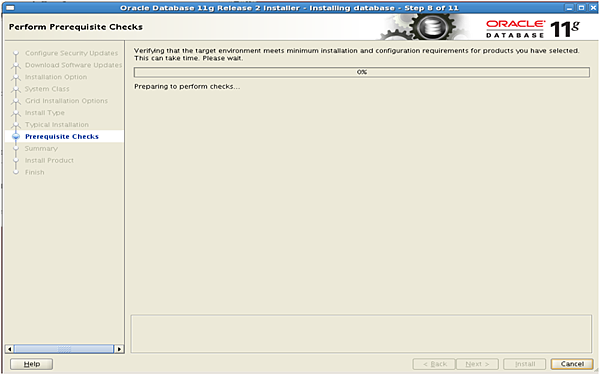
It's now ready to perform the installation by clicking Install button.


Click OK to continue.

Run root.sh on both nodes with root user, then click OK.
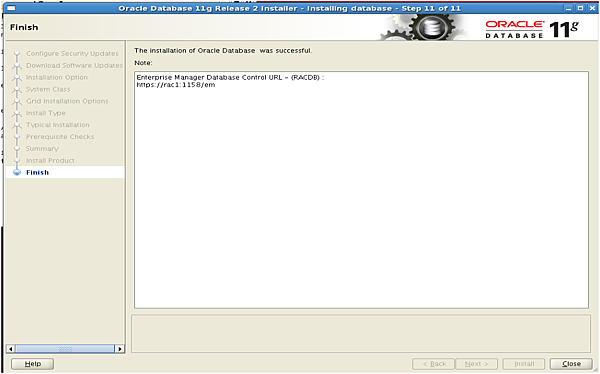
Click Close to exit.
We can now check the RACDB database status using srvctl (Sever Control Utility) or crsctl (Clusterware Control Utility) as follows:
[root@rac1 ~]# su - oracle
[oracle@rac1 ~]$ srvctl status database -d RACDB
Instance RACDB1 is running on node rac1
Instance RACDB2 is running on node rac2
[root@rac1 ~]# su - grid
[grid@rac1 ~]$ crsctl stat res -t -w "TYPE = ora.database.type"
--------------------------------------------------------------------------------
NAME TARGET STATE SERVER STATE_DETAILS
--------------------------------------------------------------------------------
Cluster Resources
--------------------------------------------------------------------------------
ora.racdb.db
1 ONLINE ONLINE rac1 Open
2 ONLINE ONLINE rac2 Open
[Reference]
1. https://www.perkin.org.uk/posts/create-virtualbox-vm-from-the-command-line.html
2. https://oracle-base.com/articles/11g/oracle-db-11gr2-rac-installation-on-oel5-using-virtualbox

請先 登入 以發表留言。